Adzooma’s automation feature allows you to create fail-safe alerts and custom rules to take action on your behalf.
It’s the 24/7 PPC virtual assistant you’ve never had.
Fundamentally, there are two ways you can create an automated rule in Adzooma. You can:
- Choose from our library of premade templates
- Or create your own rule
Each one of our premade templates has been chosen by industry experts as their go-to rules for setting up and optimising their campaigns. They’re rules that have stood the test and have proven results in optimising campaigns, including rules such as:
- Notify when cost per lead increases
- Pause ads with low CTR
- Increase campaign budget
- And more
Want to create your own rule instead?
Follow our instructions below to see how we created our ‘high volume, low conversion’ rule.
Creating a custom automation rule
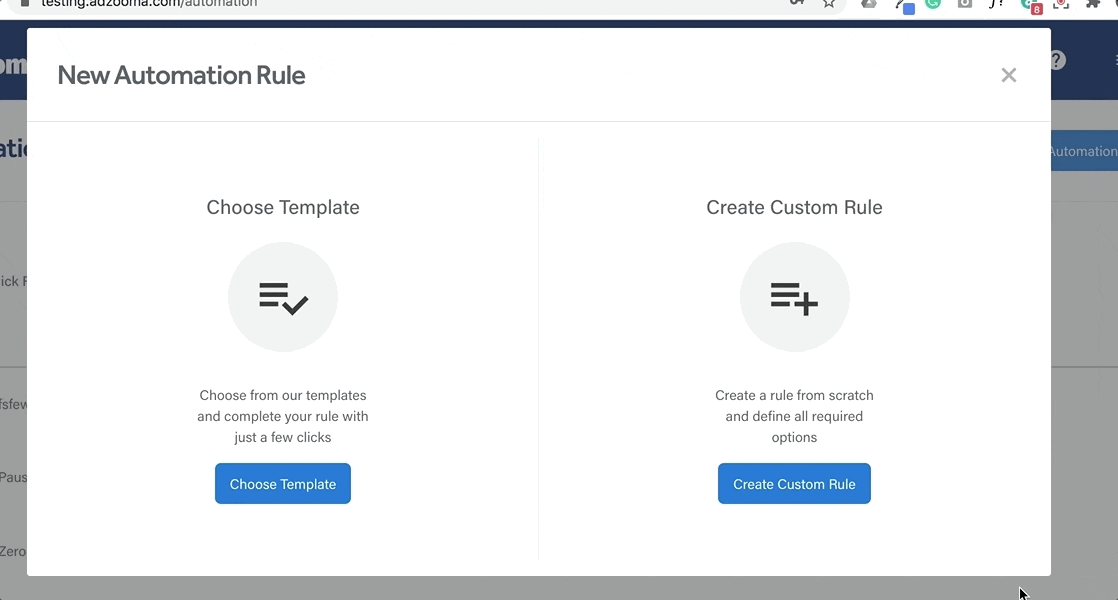
The first steps to creating your own automation rule in Adzooma is easy. Just log into your account, click automation at the top then select the ‘New automation rule’ button.
Here, you’ll get a pop up asking if you want to browse from our templates or create your own automation rule.
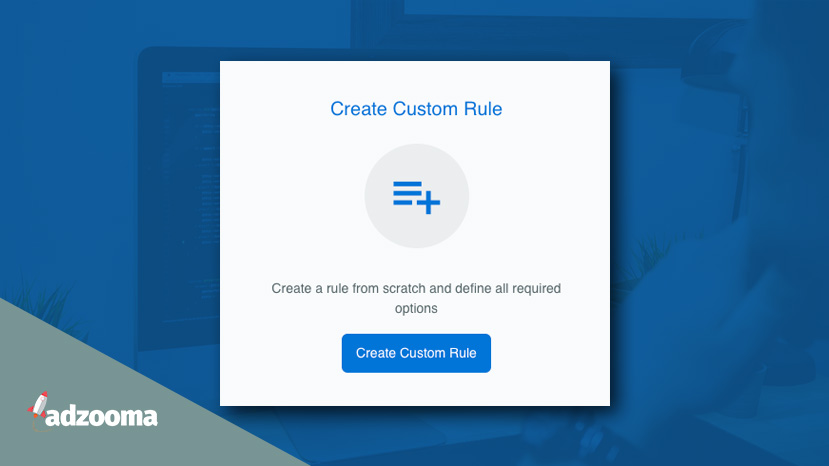
Click the ‘Create Custom Rule’ button to get started.
For this guide, we’ll be setting up a high volume, low conversion rule which will alert you to ad groups with conversion rates or a cost per conversion below your target goal.
It’s great for ad groups that have underperforming keywords that are wasting your budget.
Step 1. Give your rule a name
The first step to create your own automation rule in Adzooma is to give it a name. This is so you can quickly find it in your list of rules and understand what action you need to take when it fires.
We’re going to give this rule the name of high volume, low conversion.
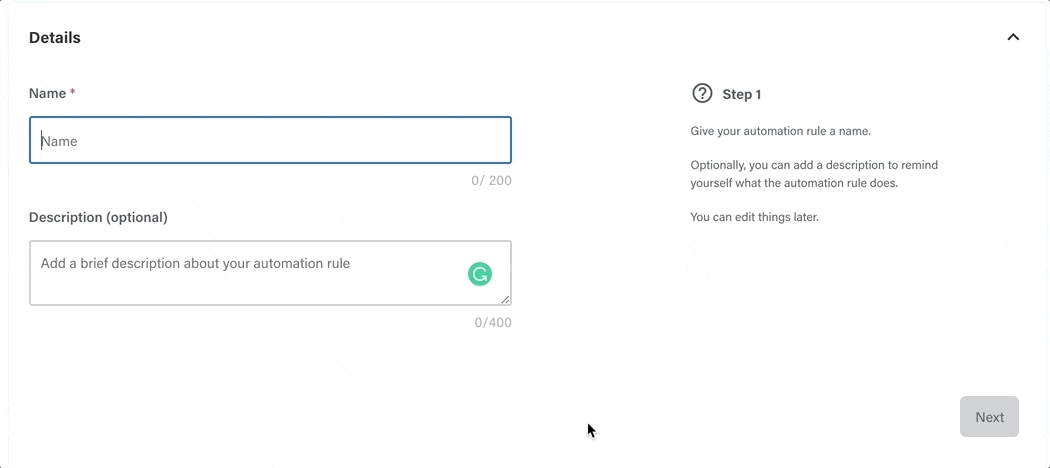
You can also add a description if you want to, which can serve as a good reminder of what it does. For this rule, we added the description of:
‘An alert for high spend ad groups with conversion rates/or cost per conversion that’s below target’.
Once you’re ready, click the ‘next’ button to progress onto the next step.
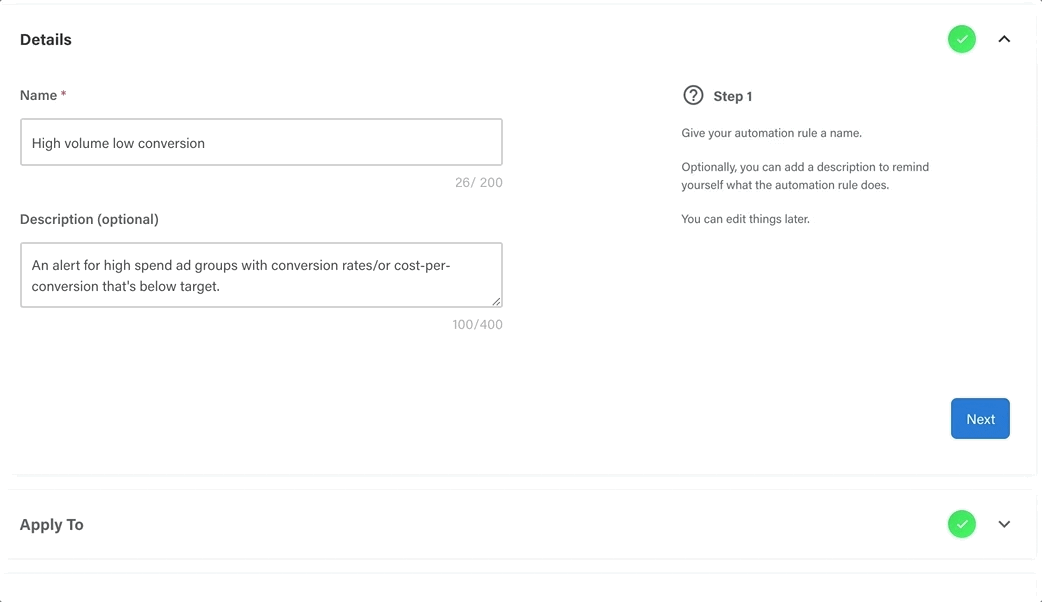
Step 2: Select where your rule applies to
On the ‘Apply To’ step, you’ll select what parts of your campaigns you want the rule to apply to. This can be at the campaign, ad group, keyword or advert level.
For this rule, we want to apply it to all our active ad groups. So, from the first drop-down menu we’ll select ad groups, and from the second we’ll pick ‘all active ad groups’.
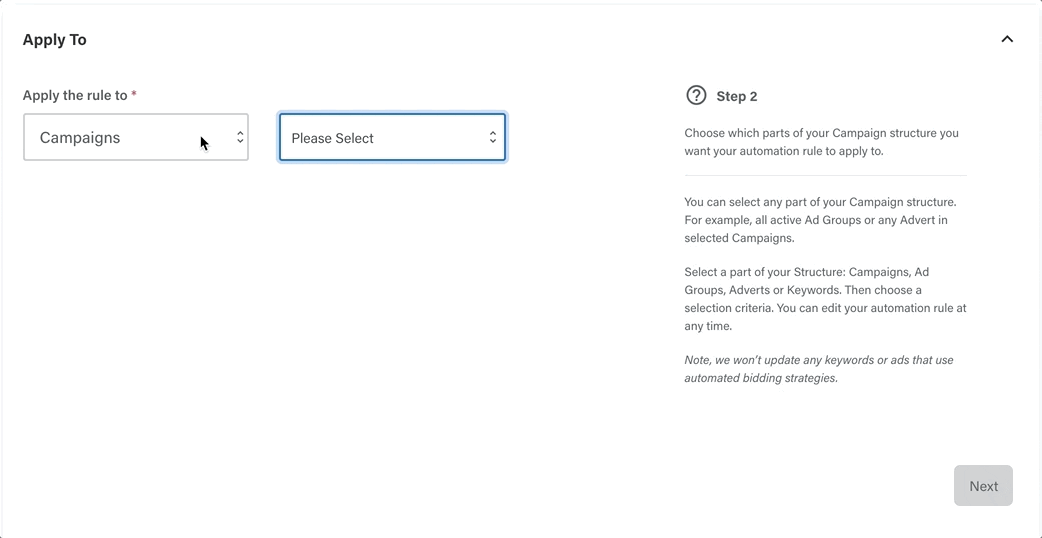
If you wanted to apply this rule to specific ad groups, click the ‘Selected ad groups option’. From there, you’ll get a pop-up menu allowing you to pick which ad groups from your campaigns that you want to apply this rule to.
Once you’re ready, click ‘next’.
Step 3: Set your conditions
This is the core of your automation rule. During this step, you’ll select what action you want Adzooma to take and when this rule will fire.
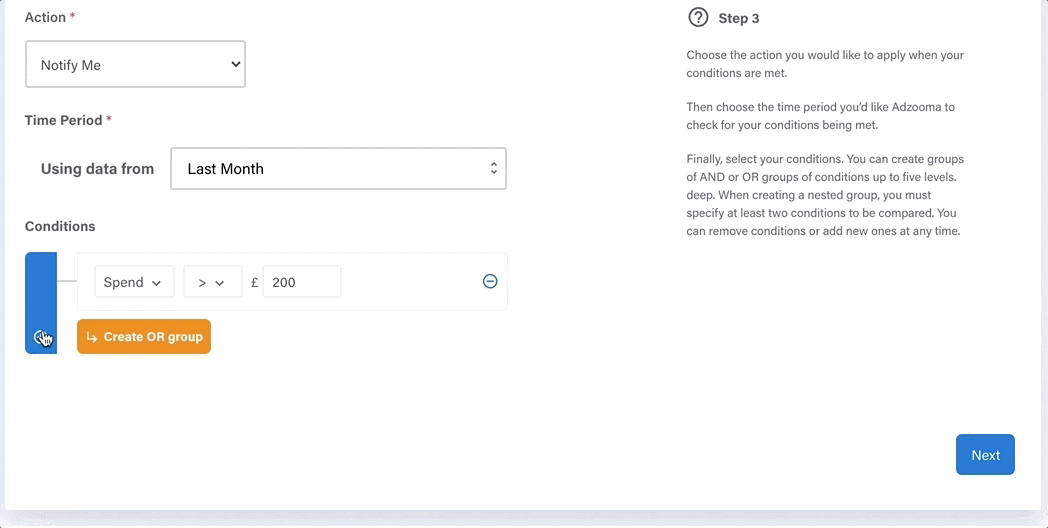
For this rule, we want to be notified of low conversions so we can go into the ad group and discover which keywords are underperforming. So, we’ll select the ‘notify me’ option from the first drop-down menu.
Second, we need to select the time period of data that you want Adzooma to check. For this rule, we’re going to use data from the past month.
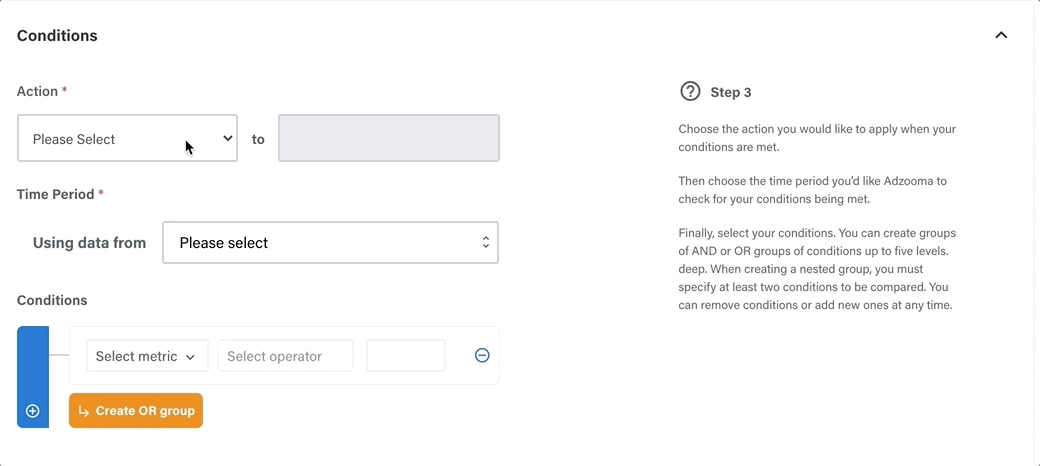
Once you’ve set your action, you can add your conditions. Conditions are specific events that need to happen before your rule takes place, such as your cost-per-click increasing to £5.
Some rules, such as pausing campaigns on a certain date, won’t require any conditions. In that case, you can go straight to the next step to choose the date it will run instead.
For the high impressions, low conversions rule, we’re going to set some And/Or conditions.
- And conditions mean all of the conditions have to be met for a rule to fire.
- Or conditions allow you to create automation rules that will fire when just one of your conditions are met.
You can read more about how they work here.
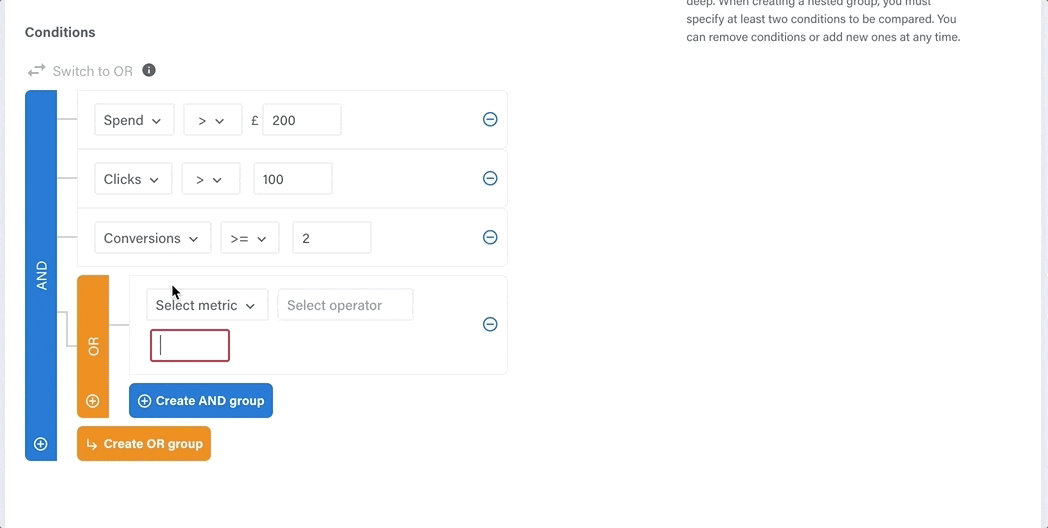
First, we’re going to add an AND condition.
Underneath conditions, select the ‘+ Add condition’ button. Then we’re going to enter the ‘spend is more than £200’ condition.
This rule will make sure that our rule only fires for ad groups that have significant spend behind them. If you’re following along, you can set the spend to any amount that suits your campaigns.

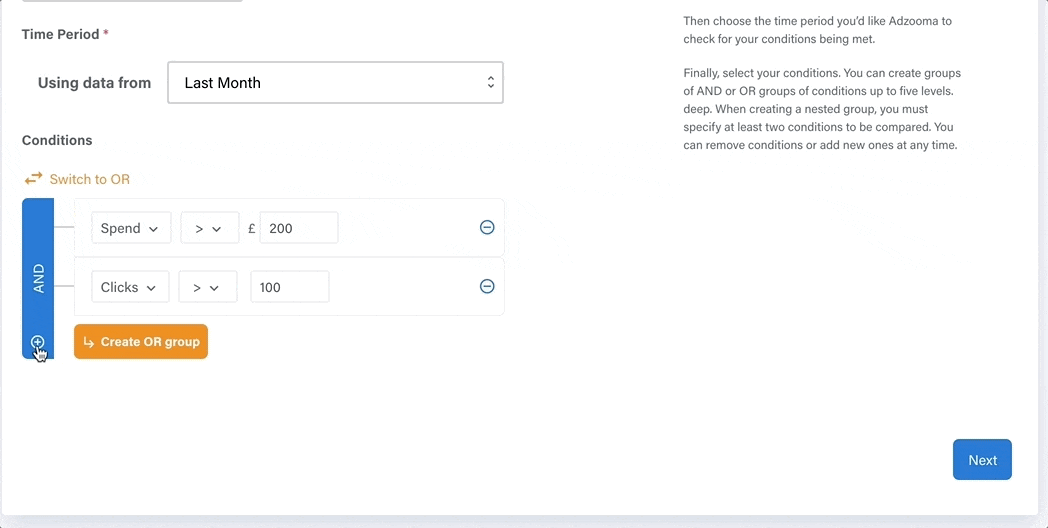
We’re going to add another AND condition to this rule. To do this, we click the blue ‘+’ button to the left of your first condition.
And groups are Blue in Adzooma. Or groups are orange. It’s simple colour coding to help make it easier.
Using the same process, we’re going to add the condition ‘clicks are more than 100’. This condition is important to set for a low conversion rule to make sure that enough data is gathered before Adzooma takes action.
Without this condition, campaigns that have just launched with 0 clicks and 0 conversions would be flagged as poor converters.
Now, we’re going to add our final And condition. This means that in order for this rule to fire, all three of these conditions must be met.
The third condition we’re going to add is that ‘conversions are more than, or equal to, 2’. Again, this condition is there to ensure that rules aren’t fired prematurely and that we’ve had enough time to collect accurate data.
Now it’s time to add some Or conditions.
To add an Or condition, click the orange ‘Create an OR group’ button. This will open up a separate subcategory within your existing And group.
Now, we add the condition ‘conversion rate is less than 2.5%’. Again, if you want to enter different numbers for your rule, feel free to do so.
To add the second Or condition, press the orange ‘+’ button to the left of your rule.
Finally, enter the final condition ‘if cost per conversion is greater than, or equal to £40’.
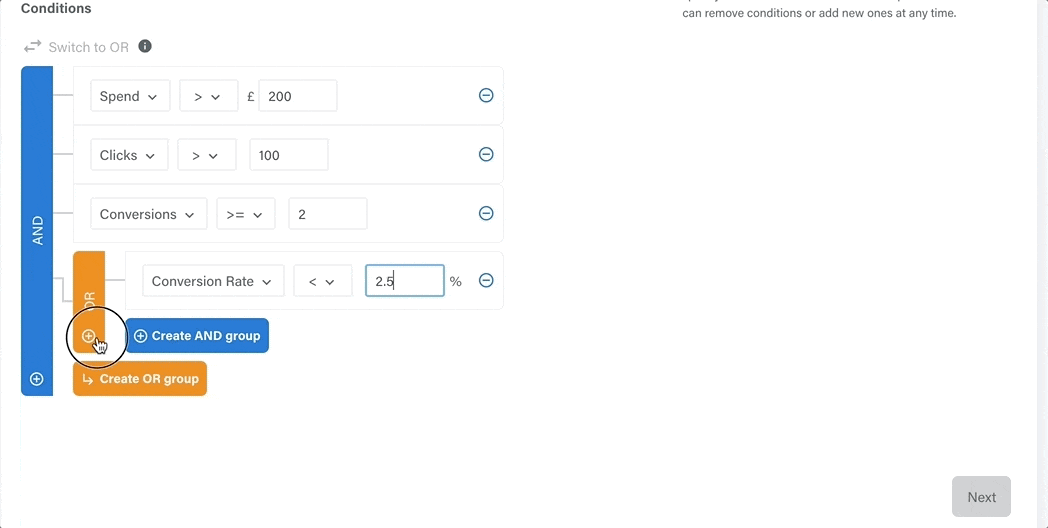
So, in order for this rule to notify you, every single one of these bullets has to happen.
- Your spend must be more than £200
- Your clicks must be more than 100
- Your conversions must be more than, or equal to 2
- Your conversion rate is less than 2.5% OR your cost per conversion is more than or equal to £40.
Think of them like checkboxes. Adzooma will keep checking whether or not it’s happened. If they’ve all been ticked, we’ll take action.
Step 4: Choose the frequency
The frequency stage is about selecting how often you want Adzooma to check to see if your conditions have been met.
For this rule, we’re going to choose to run it every day at 8.00 am ready for us to start our working day.

Adzooma supports one-off rules at certain dates, or multiple times within a day for it to run. Coming soon, we’ll also have the option to check to see if your rule has fired every half-hour.
Step 4: Select who gets notified
By default, the account owner will always be notified when a rule runs. For better management, you can notify as many or little teammates as you want by selecting their names in the drop-down menu.
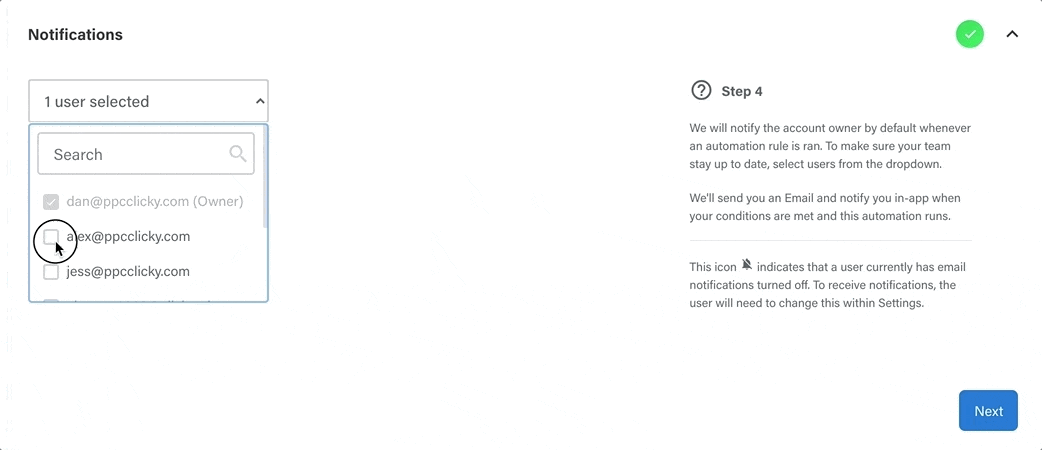
Don’t have any teammates on Adzooma yet? You can add as many as you want by going to the teams page in your menu. From this page, you’ll also be able to control what permissions they have and assign them certain accounts to better keep track of their workloads.
Step 5: Hit save
Now you’ve entered all the details, it’s time to hit save and apply it to your account.
At the bottom of this page, you’ll notice a toggle. Clicking this will change the rule’s status from active to paused. So if you want to create a rule but don’t want to turn it on just yet, click this toggle before you hit save.
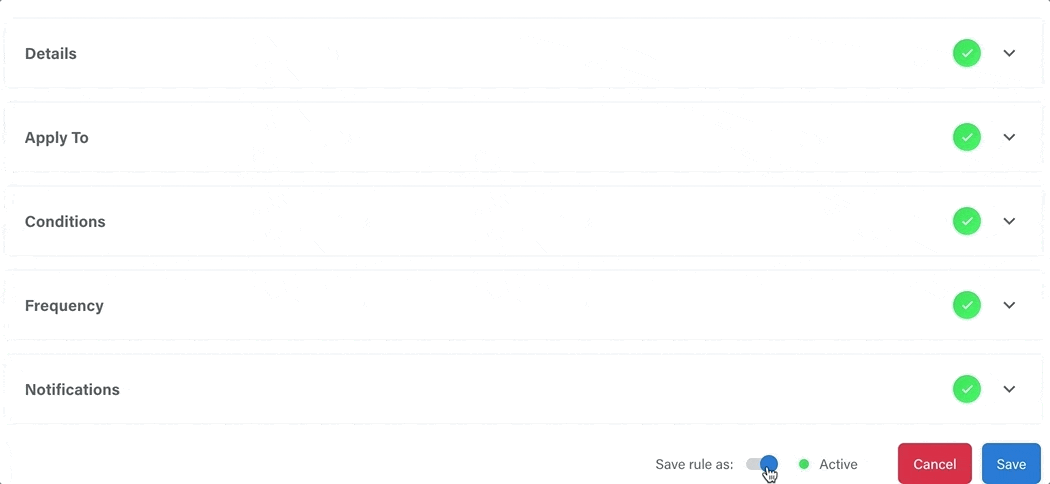
And that’s it. At any time, you can go back into this menu and edit your rule front he automation screen.
Making manual processes easy
Automated rules might look complicated, but once applied they will eliminate your manual processes and free up valuable hours that you can use to focus on the bigger picture.
If you can create this rule by following our steps, you can create anything inside Adzooma.
And of course, if you would rather see what the experts have already created, take a look at our library of premade templates instead.